When water shows up in a high-rise, minutes matter. This expanded guide gives you calm, practical steps to limit damage, protect neighbours, and keep the claim process tidy—before the certified crew is at your door. We’ll also cover prevention, timelines, and what to expect day-by-day so you’re not guessing.
Call 24/7 Emergency Services | Learn more: Water Damage Restoration
TL;DR—print this and stick it in a kitchen drawer
- Stop the source if you can do it safely. Consider electricity only if you can reach the panel without stepping in water.
- Film short clips and take photos—wide shots and close-ups—plus a quick list of times and calls.
- Call property management and a professional mitigation team immediately.
- Protect dry areas: block door thresholds, elevate furniture, isolate the wet zone.
- DIY removal only if it’s clean supply water and risk is low. Avoid grey/black water.
- Lower humidity without pushing damp air into hallways or dry rooms.
- Separate wet from dry contents; list affected items for professional cleaning/restoration.
Why the first hour sets the tone
In a condo, water travels faster than gossip. It follows gravity through slab penetrations, runs along plumbing chases, and wicks into drywall at baseboards. Early containment prevents secondary damage: swollen millwork, cupped flooring, stained ceilings in the unit below. You also set the pace for insurance—clean documentation means fewer backtracks, fewer “can you resend?” emails, and faster approvals.
Toronto’s weather doesn’t help: flash storms, summer humidity, and freeze–thaw swings all stress building systems. Supply-line failures, dishwasher leaks, and HVAC condensate overflows are common. You can’t control the surprise, but you can control the first hour—and that’s where the outcome is won or lost.
1) Find and stop the source (then consider electricity)
Go simple first. Toilet supply valve, dishwasher or laundry valves, then your unit’s main shut-off. If you don’t know where that is, scan under sinks and behind appliances for obvious drips. Listen for hissing; feel for cool, damp cabinet bottoms. If the source is unclear, call management—don’t experiment with unfamiliar valves in a mechanical closet.
Electrical safety: If you see water near outlets, baseboards, or fixtures and you can reach the breaker without stepping in water, kill power to affected circuits. If there’s any doubt, back away. A fast call to Emergency Services and your property manager beats playing hero.
Heads-up: In multi-unit stacks, even a tiny pin-hole line can impact suites above and below within minutes. Alert concierge or on-call management so they can check adjacent units.
Pro move: 90-second sweep
- Follow the sound: hissing and “rain” in walls or ceilings
- Check sinks, laundry, fridge back, and mechanical closets
- Glance at ceilings in corridors and closets you rarely open
- If you see buckling or a sag, do not poke it—flag it and call
2) Document fast and clearly (future-you will be grateful)
You’re building a record of facts: what, where, when. Use your phone and keep it steady. Label your files if you can (e.g., “Kitchen_2025-10-04_18-37”).
- Wide shots of every affected room, focusing on floors, baseboards, and wall seams.
- Close-ups of the suspected source and any damaged finishes.
- Short clips (15–30 seconds) panning slowly to show pooling, spread direction, and stains.
- Quick log with times and contacts—management, restoration dispatch, insurance.
This set lets the mitigation team plan the right equipment before they arrive and speeds approval for any necessary demolition and rebuild. It also demonstrates that you acted to prevent further damage—a detail insurers care about.
3) Make two calls: mitigation and property management
Call property management or concierge first so they can log an incident, notify security, and—if needed—inspect neighbouring units. Then call a certified restoration team for same-day extraction, containment, and dry-down. Keep the building name, unit, access instructions, service elevator booking rules, and parking details handy to remove friction.
Dispatch triage questions you’ll likely get: known source, rooms involved, flooring types (engineered wood, laminate, tile, carpet), ceiling leaks, any odours/discoloration, and whether you’ve shut water or power. The answers choose the mix of dehumidifiers, air movers, extraction tools, and whether HEPA/negative air is required.
4) Protect dry areas (simple moves, big payoff)
Your job in this window is containment. Close doors to unaffected rooms. Build quick “dams” with towels at thresholds. If you have plastic sheeting, place it under area rugs to stop dye transfer. Slip foil or plastic under furniture feet and gently elevate wood furniture with saucers or blocks to prevent staining and swelling.
Limit foot traffic. If you must move through corridors, ask building staff to lay runners and corner guards. That keeps common areas clean and speeds the crew’s path when they arrive with extraction gear.
5) Start safe removal—only if it’s clean water
If you’re sure it’s a clean supply leak and there’s no electrical risk, you can start light removal: towels, a wet/dry vac, or a small pump you actually know how to operate. Focus on standing water, then watch baseboards and under-cabinet zones where moisture hides.
Stop immediately if water looks discoloured, smells off, or appears to be backing up from a drain or toilet. That’s Category 2–3 water and it requires professional decontamination. Don’t spread it into hallways or other rooms—close the door, wash your hands, and wait for the crew.
6) Control humidity without spreading moisture
Humidity is the quiet troublemaker. If weather allows, open windows. Run kitchen and bath exhaust fans. Use portable fans to move air inside the affected room only; pointing them toward hallways just migrates moisture and odour. Don’t lose hours tinkering with a tiny home dehumidifier—the pros will bring commercial units sized to the space and conditions.
Once on site, technicians establish a controlled dry-down: measured air movement, dehumidification, potentially negative pressure and HEPA filtration if contamination is suspected. They’ll take baseline moisture readings and set daily targets so the structure returns to safe levels without over-drying finishes.
7) Triage contents—separate, don’t stack
Move dry valuables, electronics, and documents to a safe area. Stand area rugs upright to promote airflow and avoid dye transfer. Do not pile wet textiles; trapped moisture encourages staining and odour. Photograph visibly affected items and make a quick list for contents cleaning and potential restoration.
For paper and books, set them aside in a cool, dry spot. Avoid heaters—they can warp and lock in distortion. If the volume is large or the items are sensitive (legal, medical, archival), mention it during dispatch so the team brings appropriate packing materials and desiccants.
Condo realities in Toronto & the GTA
High-rise buildings bring quirks that single-family homes don’t. Three you should expect:
- Shared risers and penetrations. Moisture rides along plumbing stacks and through slab penetrations, so management may request access to units above and below to rule out hidden migration.
- Elevator and corridor logistics. Moving extraction equipment requires protection of common areas. Expect corner guards, runners, and temporary containment to keep hallways safe and passable.
- Building age and HVAC design. Older stacks and chilled-water systems complicate source tracing and dry-down planning. Coordinated communication with management and the mitigation team keeps it sane.
If the event started outdoors (wind-driven rain, façade failure) or through a compromised podium, structural elements may be involved. In that case, mitigation dovetails with building envelope assessment and repair planning.
Common causes of condo water damage (and quick prevention wins)
- Washing machine hoses: Rubber lines fatigue. Upgrade to braided stainless and replace roughly every 5 years. Shut valves when travelling.
- Dishwasher and fridge lines: Check for kinks and corrosion. Use proper ferrules/fittings; don’t overtighten.
- HVAC condensate: Clear drains seasonally. Replace clogged filters; they contribute to coil icing and overflow.
- Toilet supply valves: Exercise them twice a year so they don’t seize the one day you need them.
- Neighbour leaks: If you hear running water in walls or see ceiling staining, notify management early—upstream issues travel fast.
- Balcony doors & windows: Weatherstripping and weep holes matter during wind-driven rain. Report failed seals promptly.
How different materials react to water
| Material | Typical Reaction | What Usually Happens | What Helps |
|---|---|---|---|
| Engineered wood flooring | Cupping/crowning | Edges lift; finish may haze | Rapid extraction, balanced dehumidification; sometimes panels need lifting |
| Laminate flooring | Swelling at seams | Board edges puff; locking fails | Quick removal; section replacement often required |
| Tile over concrete | Slow to show issues | Moisture trapped in thinset; grout discoloration | Meter readings; dehumidify space; targeted drilling if needed |
| Carpet & underpad | Odour, delamination risk | Underpad holds water; tack strip rusts | Extraction, pad removal if saturated; antimicrobial treatment |
| Drywall at base | Wicking 2–10 cm+ | Tape bubbles; soft gypsum | Baseboard pull, weep holes, or cut-and-cap; controlled airflow |
| Cabinet toe-kicks | Hidden wicking | Swelling, trapped odour | Remove kick plates; force airflow; replace swelled MDF |
Your timeline: Day 0 to wrap-up
Day 0 (Incident)
- Shut the source, document, call management + mitigation
- Initial extraction, safety checks, containment as needed
- Baseline meter readings and preliminary plan
Day 1–2 (Active dry-down)
- Air movers and dehumidifiers positioned and adjusted
- Daily moisture readings, photos, and notes
- Limited demolition (baseboards, small drywall cuts) if needed
Day 3–5 (Stabilize & verify)
- Equipment reduced as readings trend down
- Target checks for stubborn areas (under cabinets, behind tubs)
- Final report prep; rebuild scope drafted if required
Rebuild (varies)
- Patch/replace drywall, millwork, flooring as needed
- Paint, re-caulk, re-install fixtures
- Final clean and sign-off
Seasonal advice (Toronto/GTA)
- Spring storms: Keep towels and plastic handy. Check balcony door seals before heavy rain weeks.
- Summer humidity: Use exhaust fans; keep AC filters clean to avoid condensate overflow.
- Fall shoulder season: Test shut-off valves before travel; label your panel and valves.
- Winter freeze–thaw: Watch for cold exterior walls; keep interiors above 18°C to reduce condensation risk.
What the professional team does on arrival
Here’s how a typical mitigation unfolds from the first knock to hand-off:
Assessment & documentation
- Moisture mapping with pin and pinless meters
- Thermal imaging to locate hidden moisture
- Category assessment (clean/grey/black water)
- Site safety review and electrical checks
Containment & control
- Source stabilization and initial extraction
- Engineering controls (negative air/HEPA) if needed
- Dust and aerosol suppression with appropriate agents
- Protection of common areas and pathways
Dry-down & monitoring
- Targeted demolition (baseboard pulls, weep holes, limited drywall)
- Placement of commercial dehumidifiers and air movers
- Daily moisture readings with clear pass/fail criteria
- Transparent updates to you, management, and insurers
Rebuild planning
- Scope and estimate for repairs and finishes
- Coordination with condo rules, quiet hours, and elevator bookings
- Option to transition seamlessly into reconstruction
- Contents restoration logistics for affected items
Insurance and documentation (simple checklist)
Insurers love clarity. No legal jargon needed—just facts in order. Use this list to keep everything together:
- Incident basics: date/time discovered; who was present; any weather notes (e.g., heavy rain, outage).
- Source (if known): “Toilet supply valve, braided line rupture,” or “Unknown, suspected unit above—management investigating.”
- Immediate actions: valves shut, power isolated (if done), towels placed, thresholds blocked.
- Notifications: property management contact + incident number; restoration dispatch time; insurance claim number.
- Media: folder of photos and 15–30 second clips labelled by room.
- Access notes: concierge details, service elevator booking, parking stall, pets on site.
- Contents list: obviously affected items (rugs, electronics, shelving) with quick photos.
Seven quick myths—busted
- “It’s only a small puddle.” If moisture has reached baseboards or seeped under flooring, it’s rarely “small.” Hidden pockets drive odour and mould risk.
- “Fans alone will fix it.” Fans move air; they don’t remove water from the air. Dehumidification is the heavy lifter.
- “If I can’t see staining, it’s fine.” Many materials darken or cup days later. Meters, not eyeballs, call the all-clear.
- “I’ll bleach it.” Bleach isn’t a universal answer and can damage finishes. Use correct antimicrobials and dwell times—ideally with pro guidance.
- “Opening all the doors helps.” It often spreads humidity to dry rooms. Keep the wet zone contained.
- “Insurance wants me to wait.” Insurers expect reasonable steps to prevent further damage. Document, then act—safely.
- “If it dried in a day, we’re done.” Surface dry ≠ structure dry. Verify with readings.
Keep a tiny “leak kit” at home
- Two rolls of plastic sheeting and painter’s tape
- Aluminum foil or furniture sliders for quick elevation
- Absorbent towels and a squeegee
- Headlamp or flashlight for closets and under-cabinet checks
- List of key numbers: management, concierge, restoration dispatch, insurer
- Permanent marker + zipper bags for quick labeling of small items
How to be ready for the crew
Clear a path to affected rooms. Contain pets. Set aside essentials (medications, chargers, work devices). Share access instructions and elevator booking details during dispatch. If you have action photos ready when the crew arrives, scoping is faster.
Two quick case minis
Case A: The pin-hole that wasn’t
A ninth-floor ensuite leak looked minor—just a damp baseboard. The owner documented well, called management, and kept the door closed. Thermal imaging later showed moisture tracking along the riser into a closet. Because the first hour was handled calmly—source closed, photos taken, thresholds blocked—demolition stayed surgical: a few baseboard pulls and small drywall cuts for airflow. Neighbours were checked early; no surprise stains the next day.
Case B: Laundry line on a long weekend
A laundry supply line failed in an eighth-floor unit while the owner was away. Concierge caught it during rounds; management called mitigation immediately. Early corridor protection and quick extraction kept water from reaching the elevator bank. The unit below had minor ceiling staining; controlled dry-down wrapped in four days. The difference maker: management’s fast incident logging and a neighbour’s spare key on file.
Bottom line
You can’t control surprise leaks or summer humidity. You can control what happens next: stop the source, document, call the right people, protect the dry areas, and avoid pushing moisture around. Do those well, and the rest—extraction, dry-down, rebuild—goes faster and cleaner.
Who to call (and in what order)
- Property management / concierge: Log an incident so adjacent units and common elements can be checked.
- 24/7 Emergency Services: Dispatch technicians, equipment, and protection for common areas.
- Your insurance claims line: Provide your documentation and the incident number from management.
- Neighbours above/below: Courtesy heads-up if migration is likely (helps with quick access for inspections).
Call 24/7 Emergency Services Contact Us Water Damage Restoration
FAQs
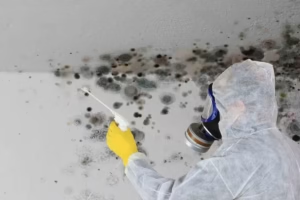
How fast does mold become a concern?
Depends on temperature, humidity, and materials, but hidden pockets (behind baseboards, under flooring) can go bad quickly in humid weather. Aim for professional assessment and a dry-down plan within 24–48 hours.
Do I need to shut off power to the whole unit?
Only if you can do it without stepping in water and there’s visible risk near outlets or fixtures. If you’re unsure, step back and wait for trained technicians.
What if the water came from a drain or toilet?
Treat it as contaminated. Isolate the area, keep doors closed, and call a professional sewage cleanup team. They’ll decontaminate before dry-down begins.
Can you help with rebuilds after mitigation?
Yes. After extraction and drying, repairs and finishes can be coordinated in line with condo rules and schedules.
Will this impact my neighbours?
Possibly. Water can travel along risers and penetrations. Management may request access to units above or below to check for hidden moisture. Early notice prevents surprises.
How do I prepare for the crew’s arrival?
Clear pathways to affected rooms, contain pets, set aside essentials (medications, chargers), and gather your photos and notes. Share access instructions and elevator booking details during dispatch.
Do you cover my building?
Service areas include Toronto, North York, and the wider GTA. If in doubt, ask—coverage is broad.